Flatout GR Suspension Setup Guide
Posted by Flatout Tech on Jan 5th 2025
Flatout Suspension Setup Guide
Print the set up guide HERE
Read Before Installing – Proper Setup Is Critical for Performance and Durability
Installing your Flatout Suspension correctly is essential for a smooth ride, proper suspension travel, and long component life. Skipping or rushing these steps will result in reduced travel, harsh ride quality, and possible shock absorber damage.
IMPORTANT: Some of our suspensions will come with springs unloaded due to packaging restrictions. You will generally receive the box with the shocks and parts, and a second box with springs. When installing the springs, if your top mount assembly nut is 19mm, torque to 36lb. If the nut is 22mm, torque to 52lb. DO NOT use in air impact gun on the nut!! We assemble with an electric impact, which is recommended.
Shop/ Installer Notice: This guide is intended for the technician performing the installation. If you are unfamiliar with threaded-body coilovers, spring preload, or ride height adjustment, do not proceed until you have reviewed this guide in its entirety. Failure to follow this set up guide could result in the warranty coverage being voided. Record spring sag information from step 4 and give it back to the customer as we will ask for this upon registering the warranty.
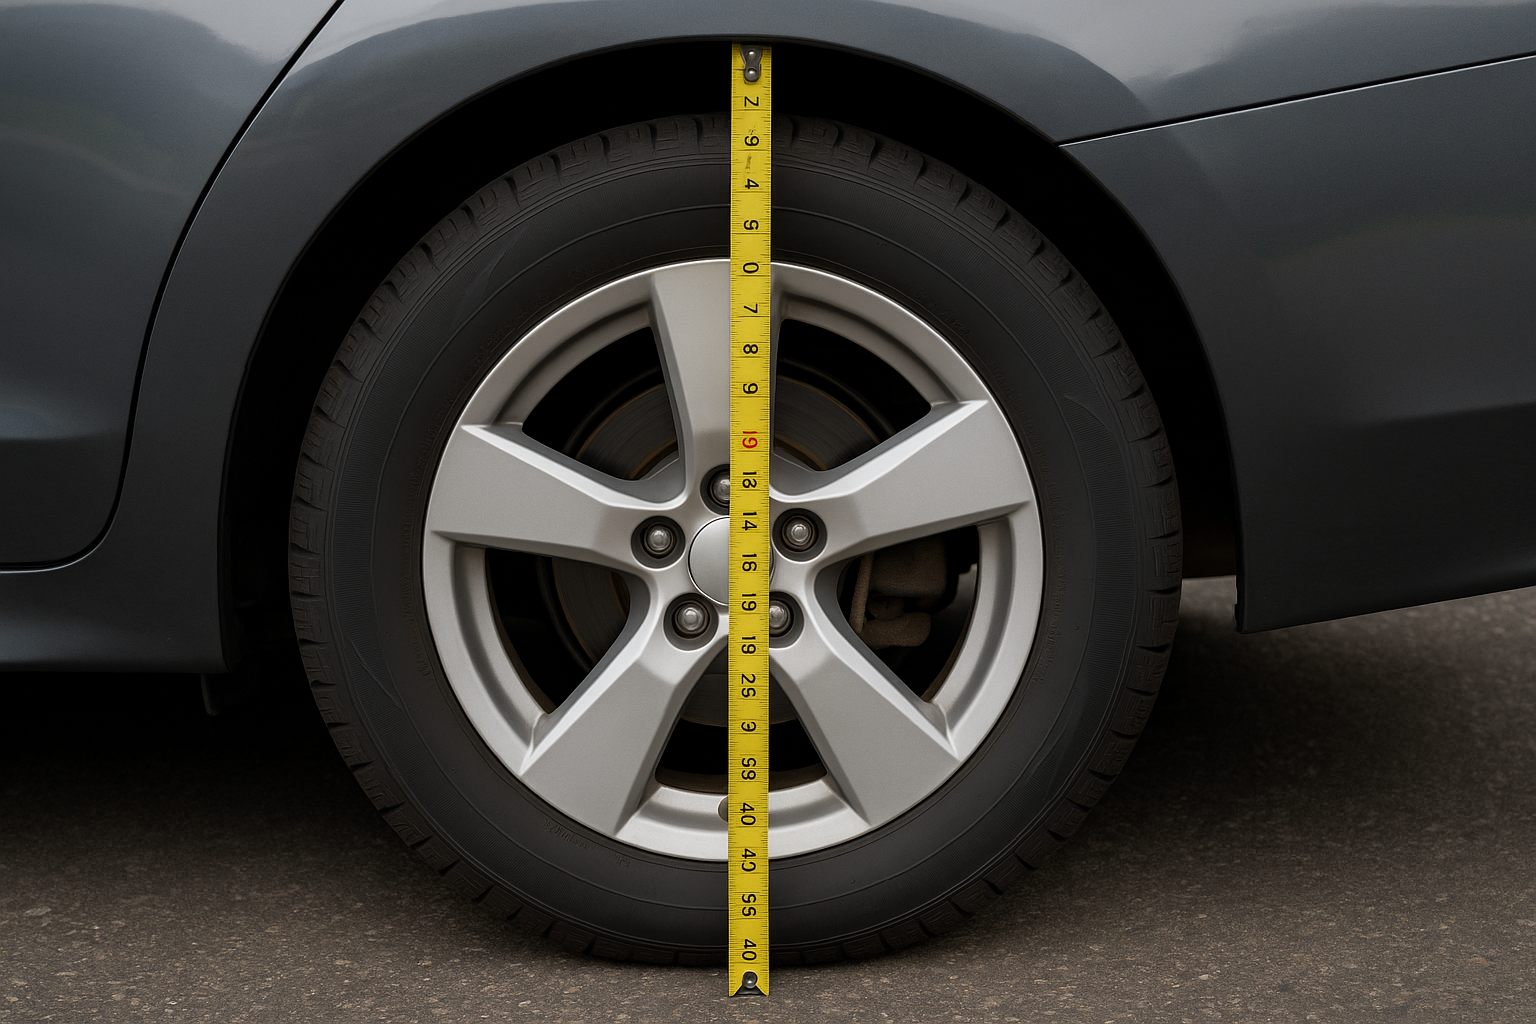
Step 1 – Measure Your Starting Ride Height
Before installation, record your vehicle’s current ride height on level ground. Choose one of the following methods (our preferred method is #1):
-
Ground to wheel arch (preferred) – Measure from the ground straight up to the center of the wheel arch.
-
Ground to pinch weld – Measure from the ground to the metal pinch weld under the door sill.
-
Center cap to wheel arch – Measure vertically from the wheel’s center cap to the fender arch.
Write down all four corners — these will be your baseline for post-installation setup.
Step 2 – Identify Your Suspension Type
Your Flatout Suspension may use one of two designs:
-
Dual-Height Adjustable Suspension (adjustable hub mount and adjustable spring preload)
-
Fixed-Length Suspension (height adjusted only via spring perch - typically rear shocks)
Follow the section that matches your kit.
Step 3 – Dual-Height Adjustable Suspension Setup
-
Remove the yellow shipping band.
The suspension is shipped under compression for safety. Cut and remove this band. -
Set the spring perch.
Move the large blue perch upward until it sits snugly against the spring.-
The spring should not rattle or move up and down freely, but it should not be excessively tight either.
-
-
Set the hub bracket.
Slide the adjustable lower hub bracket so the bottom edge is flush with the end of the shock body.-
This establishes a baseline — it’s not your final ride height.
-
-
Install all four corners and move to the next step.
Step 4 – Check Sag and Center the Shock Travel
With the suspension installed, lower the vehicle to the ground. Don’t adjust ride height yet.
Now, measure the compressed length of the spring with the vehicle’s weight on it.
You should see about 25% sag (compression) from the spring’s free length:
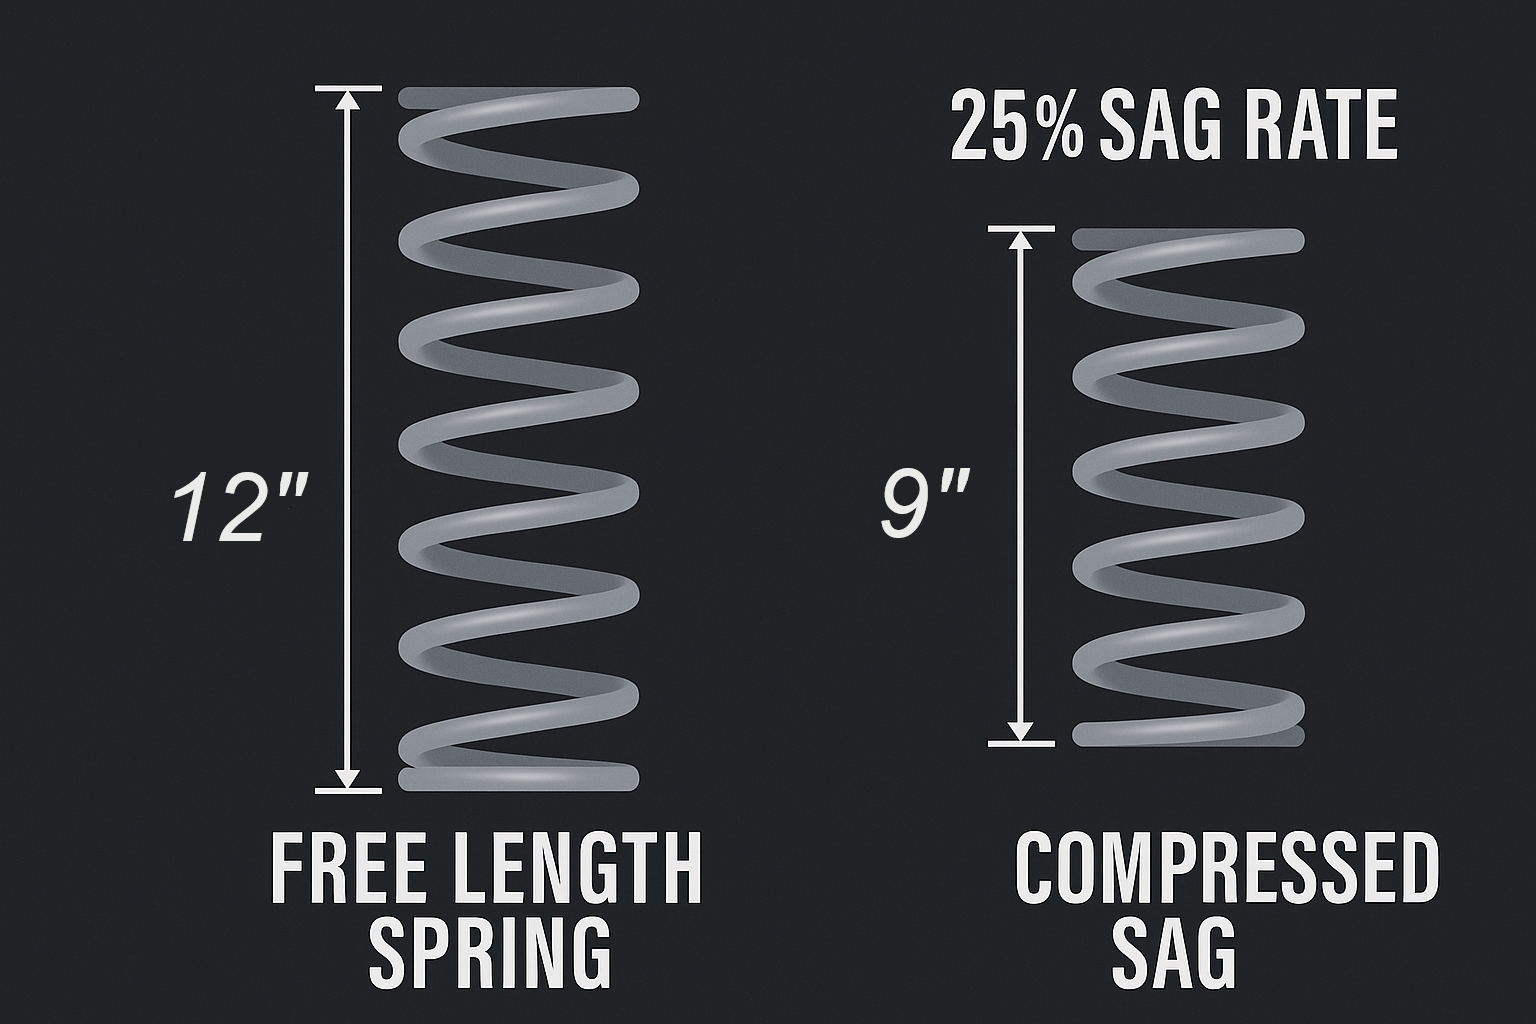
-
Example: A 12-inch spring should measure around 9 inches under the car’s weight.
-
If you measure 8 inches instead of 9, the spring is sagging too much.
To correct this:
-
Jack up the vehicle slightly to unload that corner.
-
Rotate the large blue perch upward by 1 inch.
-
When you lower the vehicle, the spring will still measure 8 inches, but you’ve added 1 inch of usable shock travel back into the system.
You want the shock to rest roughly in the middle of its stroke when the car is at normal ride height.
If your sag exceeds 40%, contact Flatout Suspension for a higher-rate spring. If the spring calculator tells you do adjust for NEGATIVE preload, DO NOT as the spring could shift and make noise. Please contact us for a slightly softer spring, or for a set of helper springs.
HERE IS AN APP THAT WILL HELP YOU SET UP SPRING SAG
**Spring Free Length and Rate are on the card included in the box**
Understanding Preload on GR-Series Suspension
It’s important to note that you are preloading the spring, but not in the traditional sense.
When most people think of preload, they picture a lowering suspension with stiff springs that compress very little — maybe ½ inch. On those setups, adding preload can change the spring’s effective rate.
That is not the case here.
Your GR-Series suspension uses softer springs designed to compress by about 25% of their free length, as mentioned above. By moving the perch upward, you’re not changing the spring’s rate — you’re just shifting where in the shock’s travel the vehicle rests.
Think of it like this:
-
Your OEM springs are much longer than the distance between the perch and top mount, which is why you need spring compressors to safely remove them.
-
With your GR coilovers, you’re doing the opposite — setting up the spring compression manually during installation.
For example:
-
If your spring sags 4 inches under the car’s weight, but your 25% target is 3 inches, you’ll raise the perch by 1 inch.
-
The spring’s measured length will remain the same — for a 12” free spring, it will still read 8” with the car’s weight on it.
-
What changes is your shock position, giving you proper travel without altering the spring rate.
In short: You are not stiffening the spring. You’re centering the shock’s usable stroke for proper ride and performance.
Step 5 – Adjust Ride Height (Dual-Height Design)
If you want to change the vehicle’s height:
-
To raise the car: Rotate the entire shock body counter-clockwise.
-
To lower the car: Rotate the shock body clockwise.
Once set, tighten all blue lock rings and recheck every bolt.
Step 6 – Fixed-Length Suspension Setup
For fixed-length shocks, the spring perch height directly controls ride height.
After measuring your current ride height:
-
To raise the car 1 inch, move the perch up 1 inch.
-
To lower the car 1 inch, move the perch down 1 inch.
Height adjustment on this design is 1:1.
Step 7 – Lock Everything Down
Once the final height is set:
-
Lock all rings securely.
-
Hold the spring perch steady with one wrench.
-
Use a second wrench on the lock ring and gently tap with a hammer until it no longer moves.
-
Repeat for all rings, including the hub bracket lock ring.
-
-
Recheck all bolts on every corner.
⚠️ Do not hand-tighten. Rings that are not properly locked will loosen, causing noise, harshness, and potential component damage.
Step 8 – Final Check After Installation
After driving 25–50 miles:
-
Recheck all lock rings and hardware.
-
Suspension components may settle slightly — tightening them again ensures long-term reliability.
Following this guide ensures:
-
Maximum suspension travel
-
Smooth and controlled ride quality
-
Long shock absorber life
Ignoring these steps will cause bottoming out, harsh ride, reduced performance, and premature component wear.